
Reading, Saving, and Displaying an Image in Python
Author: Bindeshwar Singh Kushwaha – Postnetwork Academy
Introduction
In Python, working with images is a common requirement for data science, computer vision, and AI projects.
Images can be loaded, manipulated, and displayed using various libraries such as matplotlib,
scikit-image, and OpenCV. This tutorial demonstrates how to read, save, and display
images using these three popular libraries. By the end, you will understand not only the syntax but also how
each method works internally.
Reading, Saving, and Displaying an Image Using Matplotlib
import matplotlib.pyplot as plt
import matplotlib.image as mpimg

im = mpimg.imread("brown_val1.jpg")  # read the image from disk as a numpy ndarray
print(im.shape, im.dtype, type(im))  # print image shape, dtype, and type
plt.imshow(im)                       # display the image
plt.axis('off')                      # turn off the axis
plt.show()                           # show the image in a plot
Output:
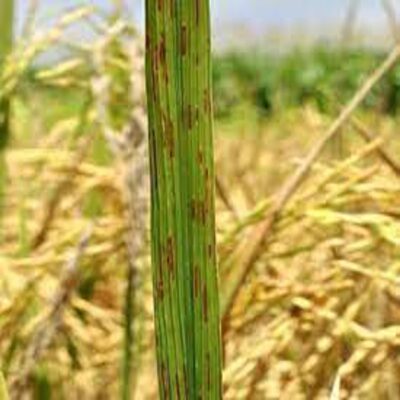
Explanation:
im = mpimg.imread("brown_val1.jpg")– Reads an image file from disk into a NumPy array.print(im.shape, im.dtype, type(im))– Prints the dimensions, data type, and array type.plt.imshow(im)– Displays the image in the current figure.plt.axis('off')– Removes axis ticks and labels.plt.show()– Displays the plot window.
Reading and Displaying an Image Using scikit-image
import skimage.io as io

im = io.imread("brown_val1.jpg")  # read the image from disk as a numpy ndarray
io.imshow(im)                     # display the image
io.show()                         # show the image in a window
Output:

Explanation:
io.imread()– Reads an image file into a NumPy array.io.imshow()– Prepares the image for display.io.show()– Displays the image in a window.
Reading and Displaying an Image Using OpenCV
import cv2

im = cv2.imread("brown_val1.jpg")      # read the image from disk as a numpy ndarray
cv2.imshow("Displayed Image", im)      # display the image in a window
cv2.waitKey(0)                         # wait for a key press indefinitely
cv2.destroyAllWindows()                # close all OpenCV windows
Output:
Explanation:
cv2.imread()– Reads the image into a NumPy array.cv2.imshow()– Opens a window and displays the image.cv2.waitKey(0)– Waits until any key is pressed.cv2.destroyAllWindows()– Closes all OpenCV-created windows.
Video
Reach PostNetwork Academy
- Website: www.postnetwork.co
- YouTube: www.youtube.com/@postnetworkacademy
- Facebook: www.facebook.com/postnetworkacademy
- LinkedIn: www.linkedin.com/company/postnetworkacademy
- GitHub: www.github.com/postnetworkacademy
Conclusion
In this tutorial, we explored three different ways to read and display images in Python: using
matplotlib, scikit-image, and OpenCV. Each library offers unique
advantages — matplotlib is great for quick inline plots, scikit-image provides
powerful image processing tools, and OpenCV is widely used for computer vision applications.
Mastering these techniques will help you handle images efficiently in data science, AI, and robotics projects.