Arduino microcontroller is a very popular open source project which can be used to make prototype for electronics, robotics and IoT projects.
In this post, I will explain how to on and off LEDs, when varying LEDs and time.
See the program and circuit

Here setup() function of Arduino runs only once, and used for pin configuration and setting data, and signal rate of serial communication between computer and Arduino. .
loop() function runs forever until you stop, you will put the main task inside loop function.
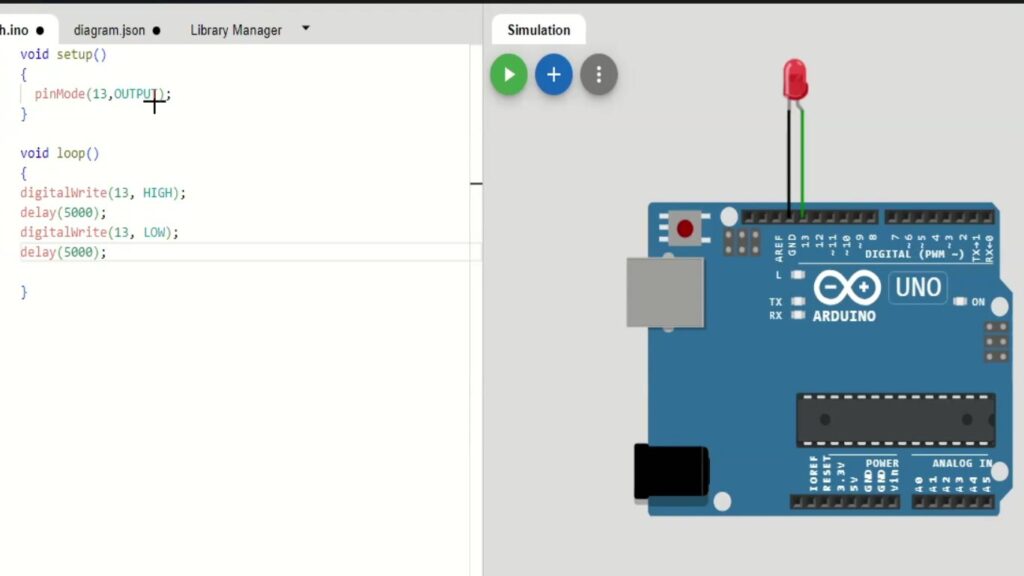
First prototype
In setup() function, pinMode(13, OUTPUT) sets the pin no. 13 for OUTPUT.
In loop() function, main instructions are written in which
digitalWrite(13, HIGH); statement causes to glow LED at pin 13.
delay(5000); statement used after digitalWrite(13, HIGH); to glow LED for 5 seconds.
digitalWrite(13, LOW); statement causes to not glow LED at pin 13.
delay(5000); statement used after digitalWrite(13, LOW); to not glow LED for 5 seconds.
See the video for whole explanation
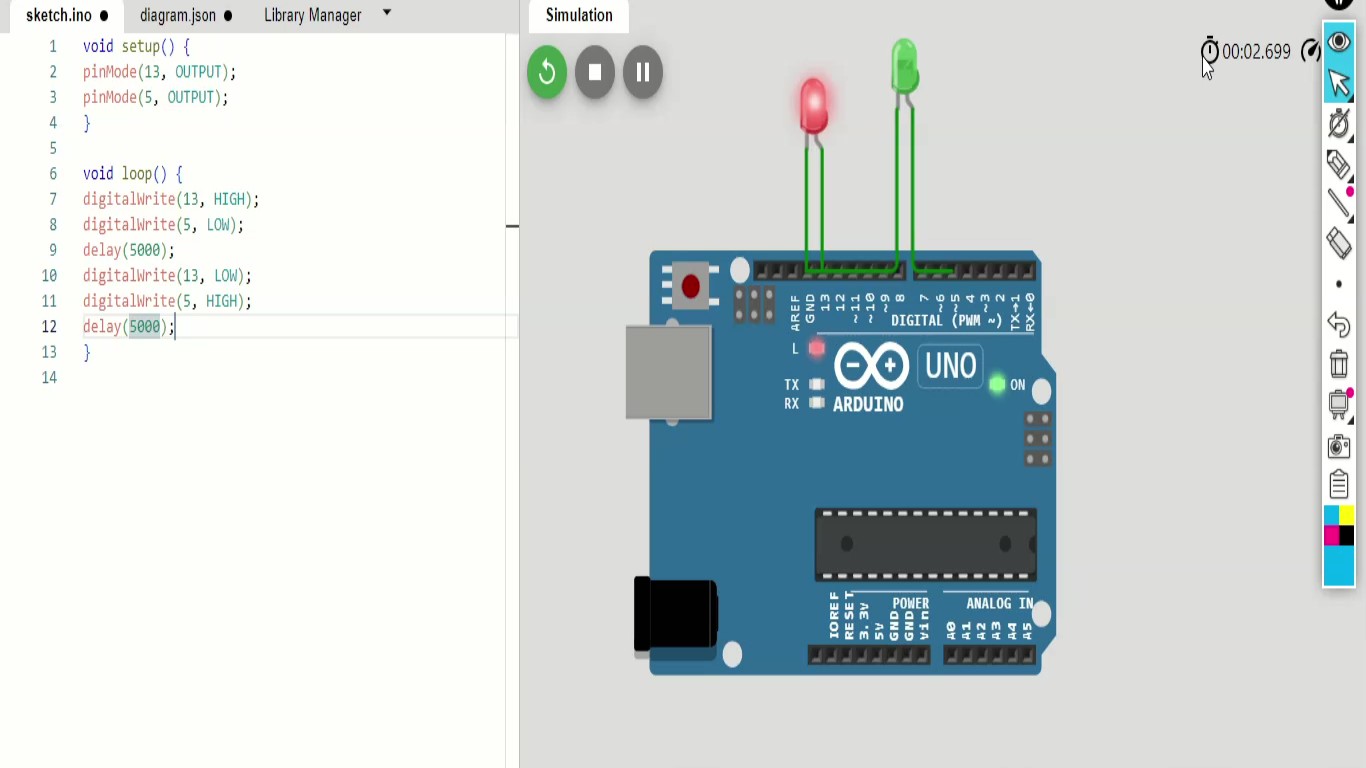
Second Prototype
Now see another prototype in which in which red LED will be on for 5 seconds and that time green LED is off.
See the code explanation
In setup() function, pinMode(13, OUTPUT) and pinMode(5, OUTPUT) sets the pin no. 13 and 5 for OUTPUT.
In loop() function, main instructions are written in which
digitalWrite(13, HIGH); statement causes to glow LED at pin 13
and
digitalWrite(5, LOW); statement causes to not glow LED at pin 5.
delay(5000); statements used after digitalWrite(13, HIGH); and digitalWrite(5, LOW); to glow red LED for 5 seconds and to not glow LED at pin no. 5 for 5 seconds.
digitalWrite(13, LOW); and digitalWrite(5, HIGH); statements causes to not glow LED at pin 13 and glow green LED at pin no. 5 .
delay(5000); statement used after digitalWrite(13, LOW); digitalWrite(5, HIGH); to not glow red LED for 5 seconds and to glow green LED for 5 seconds.
See the video for detailed explaination.
See also
- Servo Motor with Arduino (20.8)
- Display Three Names at Delay of 10 Seconds using Arduino and LCD (29.8)
- Calculate Distance using Ultrasonic Sensor and Arduino Uno Microcontroller (36.6)
- Glowing an LED using Arduino Microcontroller (55)
- Glow Two-LED Alternatively Using Arduino (56.3)
- Glow an LED using Arduino Code Explanation Line by Line (57.8)